Are you dealing with mold in your bathroom? Don’t panic, because removing mold from tile grout is a task that you can tackle yourself. In this article, we will discuss the steps you need to take to effectively remove mold from your tile grout and restore the cleanliness and beauty of your bathroom. With a few simple tools and some determination, you’ll be able to say goodbye to unsightly mold and hello to a fresh and healthy bathroom. Let’s get started!

Understanding Mold and Why It’s a Problem
What is mold?
Mold is a type of fungus that grows in damp and humid environments. It can appear as black, green, or brown spots on various surfaces, including tile grout. Mold reproduces by releasing spores into the air, which can cause allergic reactions and respiratory issues when inhaled.
Why is mold a problem?
Mold is not only unsightly but also poses several health risks. When mold spores are inhaled, they can trigger allergies, asthma attacks, and other respiratory problems. Prolonged exposure to mold can also lead to more serious health issues, especially in individuals with weakened immune systems. Additionally, mold can cause structural damage to buildings if left untreated, as it feeds on organic materials such as wood and drywall.
The dangers of mold in tile grout
Tile grout is a porous material that easily absorbs moisture, making it a perfect breeding ground for mold. When mold grows in grout, it not only compromises the appearance of the tiles but also poses health risks to anyone in the vicinity. The spores released by mold can quickly spread to other areas of the home, making it essential to address mold growth in tile grout as soon as possible.
Identifying Mold in Tile Grout
Common signs of mold in grout
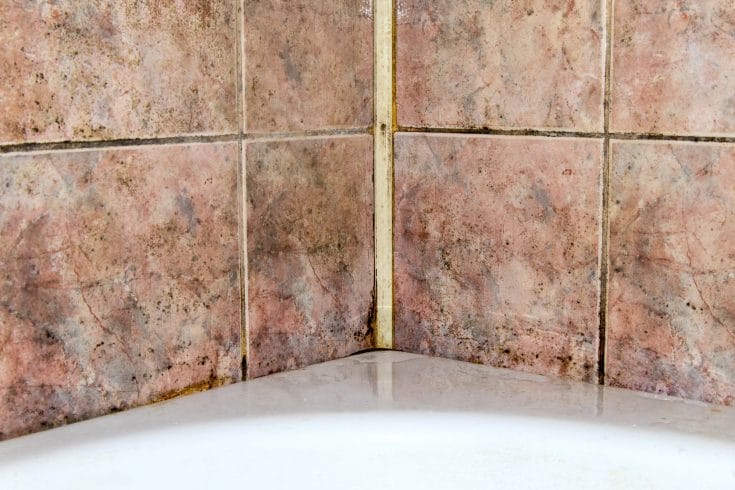
There are several telltale signs that indicate the presence of mold in tile grout. Black or dark-colored spots, patches, or discoloration are often the most evident signs of mold growth. These spots may appear fuzzy or slimy and have a musty odor. Additionally, if the grout remains damp and does not dry properly, it is more likely to harbor mold.
How to differentiate between mold and dirt
Distinguishing between mold and dirt in tile grout can be challenging, especially if the grout is heavily soiled. However, there are a few key differences to look out for. Mold typically has a fuzzy or slimy texture, whereas dirt is more likely to be gritty. Mold also tends to have a distinct musty odor, while dirt may not have any noticeable smell. If you’re unsure, it’s always best to err on the side of caution and assume it’s mold until confirmed otherwise.
When to seek professional help
While some cases of mold in tile grout can be remedied with DIY solutions, there are situations where professional help is necessary. If the mold infestation covers a large area or has spread beyond the grout lines, it’s best to contact a professional mold remediation specialist. Additionally, if you or anyone in your household is experiencing severe health symptoms, such as persistent coughing, difficulty breathing, or allergic reactions, it’s essential to seek professional assistance to ensure your safety.
Preparation and Safety Measures
Gathering the necessary supplies
Before tackling mold removal from tile grout, gather the following supplies:
- Protective gear: gloves, safety goggles, and a mask
- Distilled white vinegar
- Baking soda
- Lemon juice
- Spray bottle
- Scrub brush or toothbrush
- Clean cloth or sponge
- Water
- Bucket
Having all these supplies on hand will ensure that you’re fully prepared to tackle the mold removal process effectively.
Taking safety precautions
Safety should be a top priority when dealing with mold. Before starting the removal process, make sure to:
- Ventilate the area by opening windows or using fans to circulate air. This helps prevent mold spores from spreading to other parts of the house.
- Wear protective gear, including gloves, safety goggles, and a mask. This protects you from coming into direct contact with mold spores or inhaling them.
- Keep pets and children away from the area to minimize their exposure to mold spores.
- Follow the instructions on the mold removal products carefully and avoid mixing different chemicals, as this can create toxic fumes.
By taking these safety precautions, you can ensure your well-being while tackling mold removal from tile grout.
Protecting yourself from mold exposure
To further reduce your risk of mold exposure, consider the following measures:
- Seal off the affected area with plastic sheets to prevent mold spores from spreading to other parts of the house.
- Use a HEPA-filtered vacuum to clean up any loose mold spores on surfaces.
- Wash your hands thoroughly after handling moldy materials or cleaning products.
- Launder any clothing or towels that may have come into contact with mold separately, using hot water and detergent.
- Monitor your health for any signs of allergic reactions or respiratory issues after handling mold.
By implementing these precautions, you can minimize your exposure to mold and protect yourself from potential health risks.
Natural Remedies for Mold Removal
Using vinegar
Vinegar is a natural and cost-effective mold removal solution that can effectively tackle mold in tile grout. Follow these steps to use vinegar for mold removal:
- Fill a spray bottle with distilled white vinegar.
- Spray the vinegar directly onto the moldy grout, ensuring it is fully saturated.
- Let the vinegar sit on the grout for at least one hour to allow it to penetrate the mold.
- Scrub the grout with a brush or toothbrush to loosen the mold.
- Rinse the area with water and wipe clean with a cloth or sponge.
- Repeat the process if necessary until all the mold is removed.
Vinegar’s acidic properties help break down mold and prevent it from regrowing. However, please note that vinegar should not be used on natural stone surfaces, as its acidity can damage the stone.
Baking soda as a mold cleaner
Baking soda is another natural and effective mold removal solution for tile grout. Follow these steps to use baking soda for mold removal:
- Create a paste by mixing baking soda with water until it forms a thick consistency.
- Apply the paste directly to the moldy grout, ensuring it covers the entire affected area.
- Leave the paste on the grout for several hours or overnight to allow it to penetrate the mold.
- Scrub the grout with a brush or toothbrush to loosen the mold.
- Rinse the area with water and wipe clean with a cloth or sponge.
- Repeat the process if necessary until all the mold is removed.
Baking soda’s abrasive and antimicrobial properties help eliminate mold and prevent its recurrence. It is a safe and gentle option for removing mold from tile grout.
Lemon juice for mold removal
Lemon juice is a natural alternative to vinegar and baking soda for mold removal. Follow these steps to use lemon juice for mold removal:
- Squeeze fresh lemon juice into a spray bottle or directly onto the moldy grout.
- Let the lemon juice sit on the grout for at least one hour to allow it to penetrate the mold.
- Scrub the grout with a brush or toothbrush to loosen the mold.
- Rinse the area with water and wipe clean with a cloth or sponge.
- Repeat the process if necessary until all the mold is removed.
Lemon juice’s citric acid helps break down mold and eliminate its spores. It also leaves a refreshing scent behind, masking any musty odors.

Commercial Mold Removal Products
Types of mold removers available
If natural remedies don’t provide satisfactory results or if the mold infestation is severe, commercial mold removal products can be an effective solution. The two main types of mold removers available are:
- Mold removal sprays: These sprays contain specific chemicals that target and kill mold. They are typically applied directly onto the moldy grout and left to sit for a specific period before being rinsed off.
- Mold removal gels: These gels have a thicker consistency and adhere to vertical surfaces better than sprays. They are usually applied using a brush or spatula, left to dry, and then scrubbed off along with the mold.
Commercial mold removal products are formulated to be more potent and may require less scrubbing compared to natural remedies. However, it’s essential to follow the instructions provided by the manufacturer to ensure safe and effective use.
Choosing the right product for tile grout
When selecting a commercial mold removal product, consider the following factors:
- Compatibility with tile grout: Some products may not be suitable for certain types of grout or may cause discoloration. Check the label or consult the manufacturer to ensure the product is safe to use on your specific grout type.
- Effectiveness against mold: Look for products explicitly designed to eliminate mold. These should contain ingredients such as bleach, hydrogen peroxide, or quaternary ammonium compounds (quats), which are proven to kill mold.
Reading customer reviews and seeking recommendations from professionals or friends who have dealt with mold issues can also help you choose the most effective product for your needs.
How to use commercial mold removers effectively
To use commercial mold removers properly, follow these general steps:
- Read the instructions carefully: Each product may have specific instructions for use, including dilution ratios, application methods, and recommended safety precautions. It’s crucial to follow these instructions to achieve the best results and ensure your safety.
- Prepare the affected area: Remove any loose dirt or debris from the grout before applying the mold remover. This ensures optimal contact between the product and the mold.
- Apply the mold remover: Spray or brush the product onto the moldy grout, ensuring full coverage.
- Allow the product to work: Follow the recommended wait time specified on the product’s instructions. This allows the mold remover to penetrate the mold and weaken its structure.
- Scrub the grout: Use a brush or toothbrush to scrub the grout, loosening the mold and assisting the removal process. Pay extra attention to any stubborn areas.
- Rinse and dry the area: Thoroughly rinse the grout with water to remove any residue or remaining mold particles. Dry the area with a clean cloth or sponge.
Adhering to these guidelines will help you effectively use commercial mold removers and achieve the desired results in eliminating mold from tile grout.
Step-by-Step Guide to Removing Mold From Tile Grout
Preparing the affected area
Before starting the mold removal process, prepare the affected area by:
- Clearing the space: Remove any personal belongings, furniture, or other objects from the vicinity of the moldy grout.
- Ventilating the area: Open windows or use fans to improve air circulation and prevent the spread of mold spores.
- Covering nearby surfaces: Use plastic sheets or drop cloths to protect adjacent surfaces from any water or cleaning solutions that may come into contact with them.
By properly preparing the area, you can minimize the risk of mold spores spreading and ensure a more efficient mold removal process.
Applying the chosen mold removal solution
Depending on whether you chose a natural remedy or a commercial mold remover, follow the respective instructions provided earlier in the article for vinegar, baking soda, lemon juice, or commercial products. Apply the chosen solution to the moldy grout, ensuring complete coverage.
Scrubbing and cleaning the grout
Using a brush or toothbrush, scrub the moldy grout in a circular motion. Apply moderate pressure to dislodge the mold and remove any stains. Focus on particularly stubborn areas and ensure that the entire grout lines are thoroughly scrubbed.
Rinsing and drying the tile surface
Once the mold has been successfully removed from the grout, rinse the area with clean water. Use a cloth or sponge to wipe down the tile surface, removing any remaining residue or cleaning solution. Ensure the area is completely dry before replacing any objects or furniture in the vicinity.

Preventing Mold Growth in Tile Grout
Clean and dry tiled areas regularly
Regular cleaning and maintenance of tiled areas can go a long way in preventing mold growth in grout. Establish a cleaning routine that includes:
- Sweeping or vacuuming the tiled floor to remove loose dirt and debris.
- Wiping down the tiles and grout with a mild detergent or cleaner to remove any surface mold or stains.
- Drying the tiles thoroughly after cleaning by using a towel or allowing them to air dry.
By keeping tiled areas clean and dry, you can prevent moisture buildup and minimize the conditions suitable for mold growth.
Proper ventilation to prevent excess moisture
Proper ventilation is essential in preventing excess moisture accumulation, which is a primary factor contributing to mold growth. Follow these tips to improve ventilation in tiled areas:
- Open windows or use exhaust fans to remove moisture-laden air, especially in bathrooms and kitchens.
- Utilize dehumidifiers to reduce humidity levels in particularly damp areas.
- Avoid drying clothes indoors, as this can increase humidity levels.
By ensuring proper ventilation, you can create an environment that is less conducive to mold growth.
Sealing grout lines for added protection
Applying a grout sealer can provide an extra layer of protection against moisture absorption and mold growth. Follow these steps to seal grout lines:
- Clean the grout: Remove any dirt or mold from the grout lines by using a brush or toothbrush and a mild detergent.
- Allow grout lines to dry: Ensure the grout lines are completely dry before applying the sealer.
- Apply the grout sealer: Use a small brush or sponge applicator to apply the grout sealer along the lines, ensuring full coverage.
- Wipe off excess sealer: After allowing the sealer to sit for the recommended time, wipe off any excess sealer with a clean cloth.
Grout sealers help create a protective barrier that prevents moisture from penetrating the grout, making it less susceptible to mold growth.
When to Consult a Professional
Extensive mold infestation
If the mold infestation extends beyond the grout lines or covers a large area, it is best to consult a professional mold remediation specialist. They have the knowledge, expertise, and specialized equipment to effectively address more extensive mold problems.
Severe health symptoms
If you or anyone in your household is experiencing severe health symptoms, such as persistent coughing, difficulty breathing, or allergic reactions, it is crucial to seek professional assistance. A mold expert can assess the situation, identify the underlying causes of the health issues, and develop a comprehensive remediation plan.
Persistent mold growth despite attempts
If you have attempted multiple methods of mold removal, both natural and commercial, and the mold continues to grow or reappear, it may be a sign of an underlying moisture issue. A professional can identify the source of the moisture problem and provide appropriate remediation measures to address it effectively.

Tips and Tricks for Effective Mold Removal
Wearing protective gear
When dealing with mold removal, always wear protective gear to minimize your exposure to mold spores or cleaning solutions. This includes gloves, safety goggles, and a mask or respirator suitable for filtering mold spores.
Testing a small area before treating the entire grout
Before applying any cleaning solution or mold remover to the entire grout, test it on a small, inconspicuous area to ensure it does not cause any damage or discoloration. This allows you to assess the effectiveness of the solution and its compatibility with the grout.
Regular maintenance to prevent mold recurrence
Maintaining a clean and dry environment is key to preventing mold recurrence. Regularly clean and dry tiled areas, ensure proper ventilation, and promptly address any water leaks or moisture issues to minimize the risk of mold growth.
Conclusion
Removing mold from tile grout is a task that you can tackle yourself with the right knowledge and tools. By understanding the nature of mold and the dangers it poses, identifying mold in tile grout, taking necessary safety precautions, and using natural remedies or commercial mold removal products effectively, you can successfully eliminate mold from your grout. Additionally, implementing preventive measures such as regular cleaning, proper ventilation, and grout sealing can help keep mold at bay in the future. However, in cases of extensive mold infestation, severe health symptoms, or persistent mold growth, it is crucial to consult a professional for a comprehensive assessment and remediation plan. With these tips and tricks, you are empowered to take control of mold in your tile grout and create a healthier environment for yourself and your family.
